To upload a photo or image onto your website, the photo or image must reside on your computer, be no larger than 5 MB in size and you must have ownership rights to that image or photo.
Use of an image without license or permission is considered copyright infringement and a violation of the US copyright Law Title 17.
STEP 1: You will need to log in to your account. Please see ESQSite's Log In to Your Account Instructional.
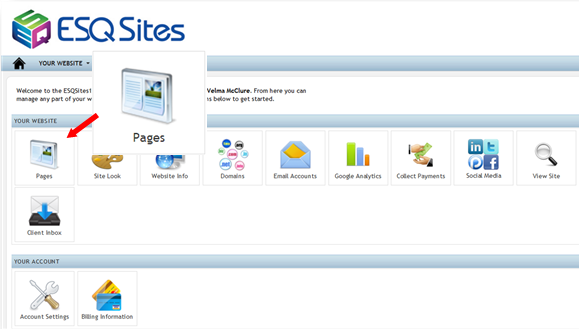
STEP 2: Click on the “Pages” icon.
STEP 3: Click on one of your website pages you wish to insert the image into.
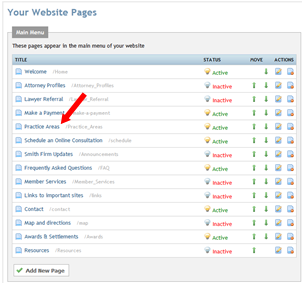
Note: You can also click on the “edit” icon under the “actions” column for the website page you wish to insert the image into.
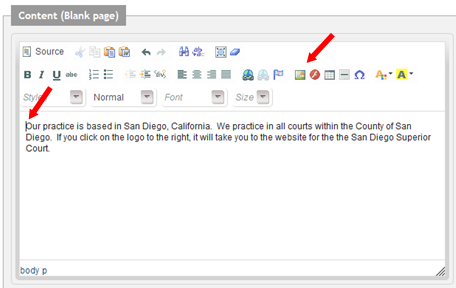
STEP 4: The editor will appear. Place your cursor where you want the image to appear on your webpage and click on the “Image” icon:
STEP 5: The "Image Properties" dialogue box will appear. The dialogue box includes three “tabs” which have custom settings that may apply to the image (i.e Image Info, Link and Advanced).
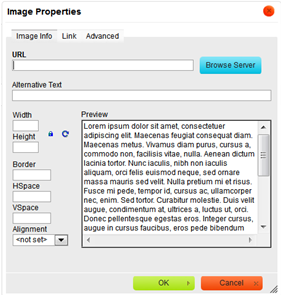
Image Info: The Image Info tab is the default tab that opens after you press the "image icon" button on the toolbar. It allows you to set the image URL and configure the way it will appear in the document.
Image Info tab elements:
a. URL – the web address of the image. The image may be located on the same server as the web site you are currently in or on an external server.
Please see ESQSites' Add Links to your Inserted Images Instructional.
b. Alternative Text – a short, meaningful, textual description of the image that tells users with assistive devices (like screen readers for users with disabilities) what the image is about.
c. Width – the width of the image in pixels. By default this is the size of the original image.
d. Height – the height of the image in pixels. By default this is the size of the original image.
e. Border – the size of the solid border around the image in pixels.
f. HSpace – the horizontal spacing (or margin) between the image border (if present) or the image itself and other document elements that surround the image, in pixels.
g. VSpace – the vertical spacing (or margin) between the image border (if present) or the image itself and other document elements that surround the image, in pixels.
h. Align – the alignment of the image in the document. Available options are Right and Left.
i. Preview – a preliminary view of the selected image formatted according to the options chosen on the left.
Link Tab: An image can have a link open when clicked on by a user. You will assign the URL (web address) and "how" the URL will open, i.e. in a New Window _blank, same window _self, etc. by completing the URL and Target fields. Please see ESQSites' Add Links to your Inserted Images Instructional.
Advanced Tab: This area is for advanced users. Please see ESQSites' Advanced Link Options.
Use of an image without license or permission is considered copyright infringement and a violation of the US copyright Law Title 17.
STEP 1: You will need to log in to your account. Please see ESQSite's Log In to Your Account Instructional.
STEP 2: Click on the “Pages” icon.
STEP 3: Click on one of your website pages you wish to insert the image into.
Note: You can also click on the “edit” icon under the “actions” column for the website page you wish to insert the image into.
STEP 4: The editor will appear. Place your cursor where you want the image to appear on your webpage and click on the “Image” icon:
STEP 5: The "Image Properties" dialogue box will appear. The dialogue box includes three “tabs” which have custom settings that may apply to the image (i.e Image Info, Link and Advanced).
Image Info: The Image Info tab is the default tab that opens after you press the "image icon" button on the toolbar. It allows you to set the image URL and configure the way it will appear in the document.
Image Info tab elements:
a. URL – the web address of the image. The image may be located on the same server as the web site you are currently in or on an external server.
Please see ESQSites' Add Links to your Inserted Images Instructional.
b. Alternative Text – a short, meaningful, textual description of the image that tells users with assistive devices (like screen readers for users with disabilities) what the image is about.
c. Width – the width of the image in pixels. By default this is the size of the original image.
d. Height – the height of the image in pixels. By default this is the size of the original image.
e. Border – the size of the solid border around the image in pixels.
f. HSpace – the horizontal spacing (or margin) between the image border (if present) or the image itself and other document elements that surround the image, in pixels.
g. VSpace – the vertical spacing (or margin) between the image border (if present) or the image itself and other document elements that surround the image, in pixels.
h. Align – the alignment of the image in the document. Available options are Right and Left.
i. Preview – a preliminary view of the selected image formatted according to the options chosen on the left.
Link Tab: An image can have a link open when clicked on by a user. You will assign the URL (web address) and "how" the URL will open, i.e. in a New Window _blank, same window _self, etc. by completing the URL and Target fields. Please see ESQSites' Add Links to your Inserted Images Instructional.
Advanced Tab: This area is for advanced users. Please see ESQSites' Advanced Link Options.
a. Id: specifies the ID of the image.
b. Language Direction: sets the language direction from left to right ( LTR ) or from right to left ( RTL ).
c. Language Code: specifies the language code e.g. en, pt, pl.
d. Long Description URL: specifies the description of the page.
e. Stylesheet Classes: specifies the name of the CSS class.
f. Advisory Title: specifies the description of the target object.
g. Style: specifies the style.
- End of Topic -
For other related topics, please see ESQSites' Format Your Content with Toolbar Editor or Format Context (Text Area) with Keystrokes and Tools Instructional or Activate or Deactivate Page on your Website Instructional or Add URL links to your Website or Add Links to your Inserted Images or Upload a PDF file to your Website or Upload a Video file to your Website or Add Anchor Links on your Website or Utilize Your File Manager Library Instructional.
Thank You for using ESQSites.
"Web design and hosting service for legal professionals."